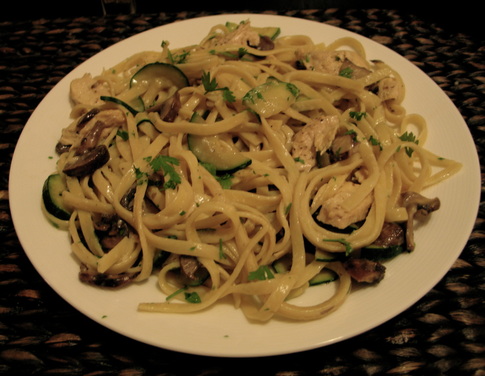
One of the first things I wanted to try when I went off the Swank diet was Fettucini Alfredo. Pre-diet days, that was my absolute favorite Italian dish and I always ordered it at restaurants. Post-diet days, it's still delicious, but the fat content is just too much for me to rationalize making at home on a regular basis. I'm still supposed to eat healthy, people! Plus, the five pounds or so that I have gained is enough for me. :)
Anyway, I came across this Ellie Krieger recipe, and decided to try it. I always love her food makeovers! This one is definitely one of my favorites and I'm so glad that I have a light alfredo dish to turn to when I'm craving a creamy pasta dish! I love the light sauce and the addition of the zucchini. I also add mushrooms because I just love them. You can pretty much add any veggie you like to this. My hubs isn't a fan of anything creamy, and even he loved this dish. When your picky eater husband approves a meal, you know that means the dish is a hit! Ingredients:
Directions: Cook pasta according to package directions. Reserve 1/2 cup of the pasta water and set the cooked pasta aside. Meanwhile, heat one tablespoon of olive oil in a large nonstick skillet/dutch oven. Add 1-2 cloves of garlic and saute over medium heat for 30 seconds, until fragrant. Add the zucchini and mushrooms and cook until tender, stirring occasionally, about 6-8 minutes. Transfer the veggies to a bowl. Heat another tablespoon of oil in the skillet. Season the chicken with salt and pepper on both sides. Cook the chicken in the pan, about 2-3 minutes per side depending on thickness. Set the chicken aside. In a small bowl, whisk the low fat milk and flour together. Add another tablespoon of oil to the skillet with the remaining garlic. Cook 30 seconds on medium heat, until the garlic is fragrant. Add the milk-flour mixture and bring it to a boil, stirring constantly. Reduce the heat to low and cook, continuing to stir, for about two minutes. Finally, add the evaporated milk, 1/2 teaspoon of salt, and the grated cheese. Stir to melt the mixture, for approximately one minute. Cut the chicken into strips and toss together the pasta, alfredo sauce, zucchini, mushrooms, and parsley. Add reserve pasta water to loosen if necessary. Taste for seasoning and serve immediately. Enjoy! *Omit the chicken and add more vegetables to make delicious vegetarian dish!
139 Comments
I'm aware that I have been a terrible blogger! Somehow I have not had the time, or have not put aside the time to post a new recipe in three whole months! Perhaps being off the Swank diet has made me feel that my recipes are just not that interesting anymore. I don't have that "Swank Diet" niche. But, I still love my food and if there are others out there in cyberspace that are still interested in reading my blog and getting some more healthy, and maybe some not so helathy recipes, I will continue to post them!
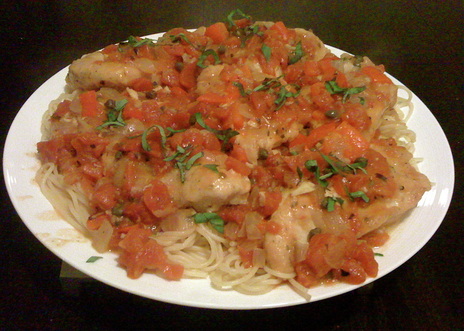
Stay tuned for updates... I have been wanting to try this recipe FOR.EV.ER (said in Squint's voice from The Sandlot). It's a Giada recipe, which almost never disappoints, and it has 575 reviews on Food Network with a 5 star rating. Seriously, this is a no brainer. However, my husband thinks Chicken Cacciatore is absolutely disgusting. He hates it at restaurants and has been scarred by previous bad experiences with this dish. Every time I mentioned it while I was meal planning, he would make it abundantly clear that he would not eat this meal if I made it. Finally, I decided to make it anyway and not tell him. Guess what??? I'm sure you know what comes next...HE LOVED IT. I actually made him repeat to me at least five times that he loved it and that he was wrong for discouraging me from making it before. I also made him swear never to question me and my cooking skills again. I won this battle! HA!
Try this recipe. It's a healthier version of Giada's and its delicious and easy. Ingredients:
Season the chicken with 1 teaspoon of salt and 1 teaspoon of pepper. Then, dredge the chicken lightly in flour. In a large saucepan or dutch oven, heat the olive oil over medium high heat. Add the chicken and cook until brown, about 5 minutes per side. Depending on the size of your pan, this could take a couple of batches. Set the chicken aside on a plate. Now add the bell pepper, onion and garlic to the pan. Add a little oil to the pan if necessary (since using skinless breasts, there may not be much grease to work with). Cook until the onions are soft and translucent, about 5 minutes. Season with a little salt and pepper. Add the wine to the pot and cook it until it reduces by half, about 3 to 5 minutes. Then add the tomatoes with their juice, chicken broth, and the oregano. Return the chicken to the pan and make sure to cover with the sauce. Bring the sauce to a simmer and cook the chicken for about 20-30 minutes. Once the chicken is cooked through, remove the chicken with tongs and place on a platter. Cook the sauce a little longer if necessary to thicken it. Pour the sauce over the chicken and sprinkle with basil. I served my chicken on a bed of spaghetti with some garlic bread on the side. This is a really delicious and easy weeknight meal. Enjoy! For those of you on Swank, I can imagine your shock while reading this. I have been on the Swank Diet for 6.5 years, and can honestly say that I have cheated less times than I can count on one hand. I have been dedicated! Even the thought of being off of it is weird to me. Being a "Swanker" has been part of my identity for a while now.
Although I have no idea how my body would have felt the last 6.5 years if I wasn't on Swank, the record has shown that this diet has not prevented my flare ups. I have had consistent flare ups every six months to a year for the last 7 years. I had to leave my career as a teacher and have barely been able to hold a part time job. In my opinion, that's proof alone that this diet isn't doing what it's supposed to be doing. I have had more than one doctor tell me that the results of the 35+ year study on the diet are inconsistent and prove that the diet is not a reliable treatment for MS. I recently had my new doctor tell me this again, and I finally decided that the enormous effort I put in to keep up with this strict diet is simply not worth it. I already have enough to deal with on a daily basis, why limit myself if it's unnecessary? That being said, being healthy IS extremely important for everyone and especially for people with MS. Many elements of the Swank diet are rules that everyone should follow. For example, I still will not eat any hydrogenated oils, MSG, mono and diglycerides, trans fats, or anything from a fast food restaurant at any time. That stuff is poison, people! I will still eat organic foods as much as possible, and avoid eating anything that is processed, deep fried, or has a lot of saturated fat. My diet will still mainly consist of white meat poultry and fish/shellfish. Most of my future recipes will still be "Swank Friendly" and I plan on making a new tag in my blog for those recipes. Overall, my blog will still be a low fat and healthy blog. So, what is going to change? Here's the list for those of you that are really interested:
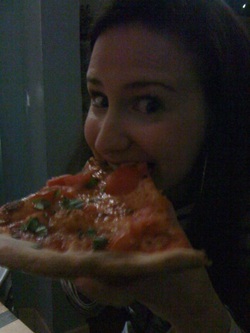
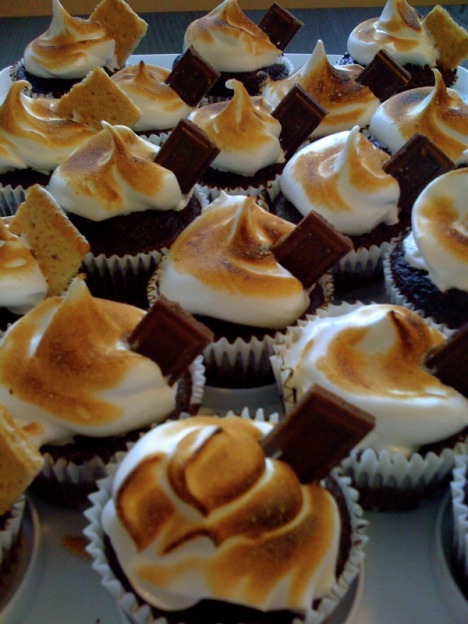
So far, I am happy with my decision and excited about it. We'll see how I do and how I feel in the next few months with my new doctor's plan. Oh and I almost forgot.... I had pizza last night for the first time in almost 7 years. It was absolutely amazing and everything I dreamed it would be. And I didn't get sick afterwards either. :) Did you read the title of this blog? Be prepared. This is the most amazing thing you will ever eat. I am not kidding, it really is hands down the best cupcake ever! I came across this recipe on a blog, and I knew that even with my dietary alterations, they would still be divine. How can graham cracker, chocolate cake, and toasted meringue frosting be bad? It simply can't be.
Even though I saw this months ago, I needed to make a necessary purchase before attempting them. As you can see from the picture, the marshmallows are perfectly toasted (just like a real s'more!). That fun part is done with a kitchen torch. I didn't have one and was seriously going to purchase one just for these cupcakes (and you should too if you don't have one). Luckily, my sister had one that she didn't use, so I just stole it from her kitchen. I finally had an occasion to make them and was so excited for the experience. Just making them is fun! The final product doesn't only look impressive, but tastes amazing. Each bite has graham, chocolate, and toasted meringue - better than a s'more! I garnished each cupcake with either a graham cracker (for us health conscious folks) or a Hershey's chocolate. Everyone at the party loved them and they were devoured quickly. I know I will be making this frequently in the future! Try them! They are a perfect summer dessert. Ingredients: For the graham cracker crust:
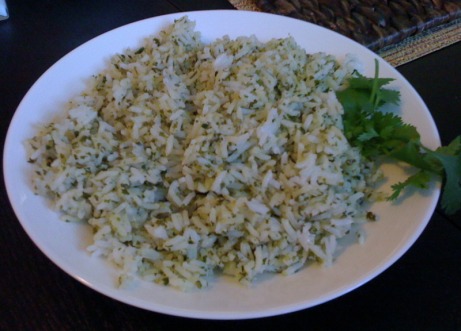
Preheat the oven to 350 degrees. Line two cupcake pans with liners. Using a food processor, grind the graham crackers into fine crumbs. Add the oil and syrup and pulse until combined. Place one tablespoon of graham cracker crumbs into each cupcake liner. Press the crackers down in each cup with the help of a bottle, glass, spoon, etc. The flat back of my espresso measuring spoon was perfect for this. Bake the graham crackers for 5 minutes in the oven. Remove the pans and set aside, keep the oven on. In a large mixing bowl, sift together the sugar, flour, cocoa powder, baking powder, baking soda, and salt. Mix well. In the bowl of a standing mixer, mix together the eggs, skim milk, vegetable oil, and vanilla extract. Add the dry ingredients to the wet and mix on low for 30 seconds. Scrape the side of the bowl and mix on high for 2 minutes. Meanwhile, boil the water in the microwave or on the stove top. Add the boiling water to the batter and mix to combine. The batter will be thin. Fill each liner about 3/4 the way full with batter. Place the cupcakes in the oven and bake for 18-20 minutes or until a tester comes out clean. Make sure to rotate the pan once while baking. Let the cupcakes cool in the pan for 5 minutes and then cool completely on a wire rack. After the cupcakes have completely cooled, make the frosting. Note: make the frosting the day you want to eat the cupcakes, the meringue will not maintain well over a day or two. I made the cupcakes the day before the event and then the frosting the day of the event. Using a double boiler (I just put a large mixing bowl over a medium pot of simmering water), whisk together the eggs, sugar, and cream of tartar. Whisk constantly until an instant read thermometer inserted into the mixture reads 160 degrees. At that point, put the mixture into the bowl of a standing mixture fitted with the whisk attachment. Start whisking on low and the gradually move up the speed to medium high. Let mix for a few minutes until stiff, glossy peaks are formed. Be patient, this may take a while! Once you have stiff peaks, mix in the vanilla extract. Using a piping bag or zip lock bag with the corner cut off, pipe some frosting on each cupcake in a swirl pattern. Then, using a kitchen torch, toast the top of each cupcake. Be prepared to quickly blow out some little fires if the torch accidentally makes the cupcake liner catch fire :). Garnish the cupcakes with a piece of graham cracker or a Hershey chocolate. Serve the same day and enjoy! Be prepared to receive lots of compliments! If you like Chipotle, you probably like cilantro rice! I have been wanting to make this rice at home for the longest time. I finally came across a recipe that sounded perfect. The best part is, it's extremely easy! I was done within 20 minutes (and rice takes about 15). Easy and delicious, you can't go wrong there. This is great with fajitas, burritos, tacos, you name it. Enjoy!
Ingredients:
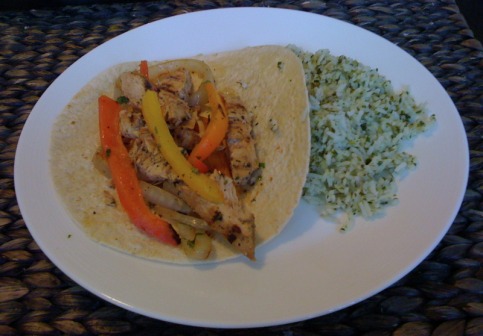
Place one cup of rice and two cups of water in a large pot. Bring the water to a boil and stir. Lower the heat and simmer for 15-18 minutes or until all the water is absorbed and the rice is tender. Meanwhile, using a food processor/blender mix together the cilantro, salt, lime juice, olive oil and garlic. Blend together until smooth. After the rice has cooked, fluff it with a fork and add the cilantro mixture to the rice. Stir well and serve! Mmmm chicken fajitas! I mean can you go wrong with this dish? This is just one of those recipes where you read the ingredients and your mouth waters. You know it can't possibly be bad with all the amazing elements involved. I hadn't had chicken fajitas in years and ooo this recipe did not disappoint! The marinade/sauce is delicious and the veggies are saucy and grilled to perfection. These are just amazing and healthy fajitas. This is a great summer (and year-round) recipe. Try it with some cilantro rice and even some guacamole - yum!
Ingredients:
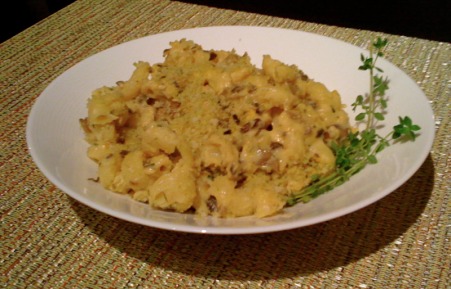
In a bowl, whisk together the lime juice, oil, garlic, Worcestershire sauce, brown sugar, jalapeno, cilantro, salt, and pepper. Reserve 1/4 cup of the marinade and set aside for later use. Put the marinade and the chicken breasts in a zip lock bag and refrigerate for at least 20 minutes. Massage the marinade into the chicken at least once while marinating. While the chicken is marinating, heat up the grill. I used an indoor grill that worked perfectly. Place the chicken on the grill and cook about 2-3 minutes per side, or until cooked through (check to make sure it's no longer pink inside). Meanwhile, brush the onion rings and bell peppers with the remaining two tablespoons of oil. Place them on a cooler part of the grill, skin side down, and sprinkle with salt and pepper. Grill the vegetables for 8-10 minutes or until they are charred and crisp tender. Make sure to turn at least once while grilling. After the chicken is cooked, cut the breasts into thin strips and place in a bowl. Toss with two tablespoons of the reserved marinade. Once the veggies are cooked, slice and separate the onions into strips and place the onion slices and peppers into another bowl. Toss with the remaining two tablespoons of marinade. Grill the tortillas for about 20-30 seconds per side. Make sure not to overcook them, you want them to still be pliable. Serve the fajitas with some fat free yogurt/sour cream, guacamole, rice, and whatever else you like! Enjoy! *Note: This picture does not do the dish any justice. I was too hungry to take a decent photo!* Ok this is by far the most mouth watering, amazing, and flavorful macaroni and cheese ever. I decided to make this while my husband was out of town, since he isn't a big fan of mac and cheese. I intended to eat it for a about a week for lunch, but that did not happen. I finished it in about two days! All by myself! I was a bit upset with myself for eating like such a pig, but I just couldn't help it. The regular ol' mac and cheese that I make is definitely good, but this one doesn't even compare. The sauteed mushrooms and herbs add so much flavor to this dish, which is great when cooking with something flavorless like fat free cheese. The blend of cheeses worked very well too. I was wary about substituting gruyere cheese for fat free swiss cheese, but the results were surprisingly good. The bread crumbs on top also add a nice crunchiness to each bite. Overall, I was ecstatic with the results. I cannot wait to make this again and this time I will have my husband try it as well. I highly recommend this and think everyone should add it to their grocery list...now! :) Ingredients:
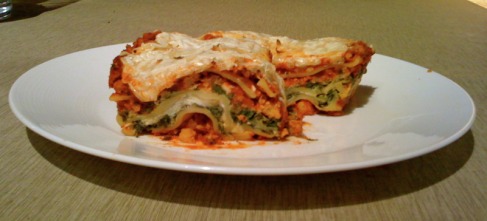
Preheat the oven to 400 degrees. Meanwhile, cook the pasta according to the package directions, drain and set aside. Then, chop the shallot, mince the garlic and herbs, and shred the cheeses. Set aside all ingredients. Heat 1 tablespoon of olive oil in a large skillet. Add the chopped mushrooms and saute until the mushrooms are tender, about 5-7 minutes. Stir in the garlic and saute until fragrant, about 1 minute. Season the mixture with salt and pepper, add the white wine vinegar and set aside. Next, in a medium saucepan heat the other tablespoon of olive oil. Whisk in the flour and make a paste. Continue whisking the paste for a couple of minutes until it turns golden. Stir in the fresh herbs and continue whisking for about 1 minute, until they are fragrant. Pour in the milk and whisk constantly while the mixture simmers and thickens. Finally, add the shredded cheese gradually, stirring constantly so that there are little or no clumps. Add the cooked pasta and mushroom mixture into the cheese sauce. Stir really well to combine everything together evenly. Pour the mixture into abaking dish coated with cooking spray. Sprinkle the breadcrumbs on top and bake for 15-20 minutes. Let it cool for 15-20 minutes before serving. Enjoy! I love, love, love lasagna. Who doesn't though? I mean it's great for large crowds, great to freeze, great to reheat, and just tastes amazing. Recently I was invited to a large family party where they served lasagna. Of course I could not eat it, which made me want to make a michi-friendly version at home immediately. There are a million lasagna recipes, but I think the classic recipes are the best. Of course, when cooking low fat nothing is "classic", but I try to make dishes taste as close to the original as possible. I used turkey instead of sausage or ground beef and fat free cheese instead of full fat cheese. The outcome was definitely better than expected. The spinach in the dish added a lot of delicious flavor and the Lifetime cheeses have yet to disappoint. I'll definitely be putting this into the rotation. Enjoy!
Ingredients:
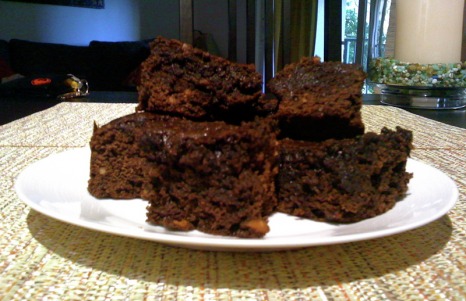
Directions: Preheat the oven to 350 degrees. Cook the lasagna according to package directions. Make sure to salt the pasta. Once al dente, take the noodles out of the water carefully with tongs and place them in a single layer on kitchen or paper towels. This allows the noodles to dry straight without curling, which makes it easier to assemble the lasagna later. While the pasta is cooking, brown the turkey on medium heat in a medium pot with the olive oil. Crumble the turkey and make sure it is cooked evenly. Add the onion, garlic, and 1/3 of the parsley to the pot. Cook for a few minutes until the onions are translucent. Mix in the tomato sauce, tomato paste, water, Italian seasoning, basil and oregano. Bring the mixture to a boil, then reduce the heat and simmer for 10 minutes. Meanwhile, in a medium mixing bowl, combine the remaining 1/3 cup of parsley, cottage cheese, spinach, parmesan topping, eggs, garlic salt, and pepper. Beat the mixture well until everything is blended evenly. After the sauce has simmered, spread two cups of the tomato sauce evenly into a 9x13 baking dish (or the closest size you have). Then, place 3-4 lasagna noodles on top of the sauce. After that, spoon the spinach mixture on top of the noodles evenly in a thin layer. Spoon more tomato sauce on top of the mixture and then sprinkle with 1 cup of mozzarella cheese. Layer 3-4 more lasagna noodles on top and then the remaining spinach mixture. Then spread half of the remaining sauce and another cup of mozzarella cheese. The final layer will have 3-4 noodles, the remaining sauce, and the remaining cheese. Cover tightly with aluminum foil and bake for 45 minutes. Remove the foil and cook 10-15 more minutes until the cheese is bubbly (remember fat free cheese melts and looks differently than regular cheese). Let the lasagna cool for 10 minutes and serve. Bon Appetit! I have officially perfected Swank-friendly brownies! In fact, I have gone back and deleted my previous brownie post, because there is just no point in keeping it up anymore. These brownies are rich and decadent, and not "diet" tasting at all. The previous brownies were delicious, but they didn't have that level of richness that all brownies need. Since they were missing a little something, I decided to test the recipe again and this time added dark chocolate cocoa powder, a little white sugar, skim milk, and vanilla extract. That paired with cooking the brownies at a perfect temperature turned out to be an ah-mazing brownie.
These brownies are in no way fat free, but being that they don't have butter, real chocolate, or any other ingredients high in saturated fat, they are quite impressive. Definitely try them! Yum! Ingredients:
Preheat the oven to 350 degrees. Sift together the flour, baking powder, salt, raw sugar, brown sugar and white sugar together in a large mixing bowl. The raw sugar may not fit through your sifter, so just pour the remains in the bowl with the other ingredients. Stir well with a wooden spoon. In the bowl of a standing mixer, mix together the eggs and egg whites. Gradually at the vegetable oil to the eggs. Add the applesauce and mix some more. Slowly add the dry ingredients to the wet. Scrape the bowl to ensure all the ingredients are evenly incorporated. Add the peanut butter to the mixture and mix again. After that, add the cocoa powder, skim milk, and vanilla extract. Mix, mix, mix. Pour the brownie batter into 9x9 inch cooking pan greased with nonstick cooking spray. Cook 35-40 minutes or until a tester comes out almost clean (make sure not to overcook them!). Tip: Spray the measuring cup with nonstick spray in order to coax the peanut butter to slide right out. Let the brownies cool completely before cutting. |

 RSS Feed