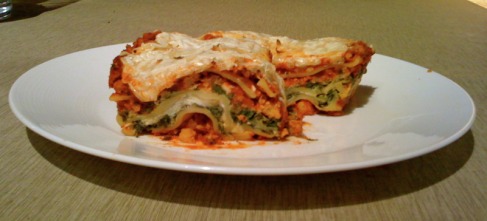
 I love, love, love lasagna. Who doesn't though? I mean it's great for large crowds, great to freeze, great to reheat, and just tastes amazing. Recently I was invited to a large family party where they served lasagna. Of course I could not eat it, which made me want to make a michi-friendly version at home immediately. There are a million lasagna recipes, but I think the classic recipes are the best. Of course, when cooking low fat nothing is "classic", but I try to make dishes taste as close to the original as possible. I used turkey instead of sausage or ground beef and fat free cheese instead of full fat cheese. The outcome was definitely better than expected. The spinach in the dish added a lot of delicious flavor and the Lifetime cheeses have yet to disappoint. I'll definitely be putting this into the rotation. Enjoy!
Ingredients:
Directions: Preheat the oven to 350 degrees. Cook the lasagna according to package directions. Make sure to salt the pasta. Once al dente, take the noodles out of the water carefully with tongs and place them in a single layer on kitchen or paper towels. This allows the noodles to dry straight without curling, which makes it easier to assemble the lasagna later. While the pasta is cooking, brown the turkey on medium heat in a medium pot with the olive oil. Crumble the turkey and make sure it is cooked evenly. Add the onion, garlic, and 1/3 of the parsley to the pot. Cook for a few minutes until the onions are translucent. Mix in the tomato sauce, tomato paste, water, Italian seasoning, basil and oregano. Bring the mixture to a boil, then reduce the heat and simmer for 10 minutes. Meanwhile, in a medium mixing bowl, combine the remaining 1/3 cup of parsley, cottage cheese, spinach, parmesan topping, eggs, garlic salt, and pepper. Beat the mixture well until everything is blended evenly. After the sauce has simmered, spread two cups of the tomato sauce evenly into a 9x13 baking dish (or the closest size you have). Then, place 3-4 lasagna noodles on top of the sauce. After that, spoon the spinach mixture on top of the noodles evenly in a thin layer. Spoon more tomato sauce on top of the mixture and then sprinkle with 1 cup of mozzarella cheese. Layer 3-4 more lasagna noodles on top and then the remaining spinach mixture. Then spread half of the remaining sauce and another cup of mozzarella cheese. The final layer will have 3-4 noodles, the remaining sauce, and the remaining cheese. Cover tightly with aluminum foil and bake for 45 minutes. Remove the foil and cook 10-15 more minutes until the cheese is bubbly (remember fat free cheese melts and looks differently than regular cheese). Let the lasagna cool for 10 minutes and serve. Bon Appetit!
45 Comments
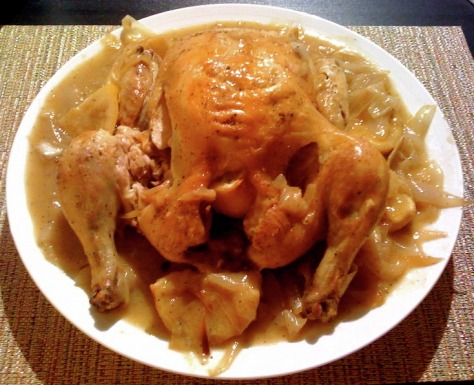 The rumor is that if you make this simple and full-proof roast chicken, your significant other will propose to you soon after. Hence the name, Engagement Roast Chicken! I have heard of the legend of this chicken before, but only decided to try it recently after my mom told me how tasty it is. I mean really, chicken, lemon, garlic, olive oil - it has to be good!
This meal was surprisingly delicious and very simple. Ina Garten's version (which of course is the version I made) rates it as "medium" difficulty, but I have to say that I found it quite easy to make. If you know how to chop vegetables and not overcook your poultry, you're good to go. Unfortunately, I can't comment if the legend is true and your significant other will propose soon after eating this dish, because I'm already married. I can say though that my husband loved it and I got a lot of praise! Enjoy! *Swankers, I did leave the skin on while cooking because I am substituting chicken cooked with skin for my read meat this week. However, I'm sure it would be just as delicious without the skin since the sauce is so flavorful. Ingredients:
Directions: Preheat the oven to 425 degrees. Remove the giblets from the chicken and discard. If necessary, pat the outside of the chicken dry. Sprinkle salt and pepper inside the cavity of the chicken. Put two lemon quarters inside, along with the two garlic halves. Brush the outside of the chicken with olive oil and sprinkle generously with salt and pepper. Tie the legs of the chicken together with kitchen string and tuck the wings under the chicken. In a large bowl, toss together the remaining lemon quarters, chopped onions, 1 tablespoon of olive oil, 1 teaspoon of salt, and 1/2 teaspoon of pepper. Place the chicken in a small roasting pan (11 x 14) and pour the onion and lemon mixture around the chicken. Bake the chicken for about 1 hour and 15 minutes, or until the juices run clear when you cut between the leg and the thigh. After the chicken has cooked, place the chicken on a platter and cover with tinfoil. While the chicken is resting, make the sauce. Place the roasting pan, with the onions and lemon left inside, on the stove on medium high heat and add the wine to the pan. Using a wooden spoon, scrape up all the brown bits. Then, add the chicken stock and stir some more. Finally, add 1 tablespoon of flour to the sauce and mix nonstop for one or two minutes until the sauce thickens. Add any chicken drippings from the platter and mix more. Finally, pour the sauce around the whole chicken and serve. You can also carve the chicken and pour the sauce over it. Yum! By the way, mashed potatoes and asparagus go great with this dish! 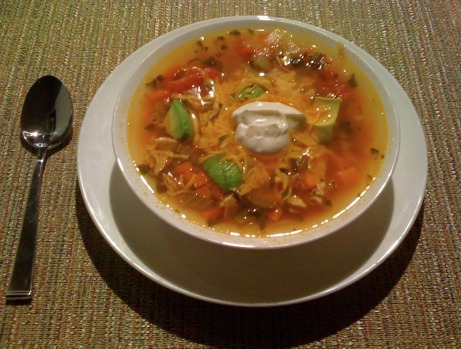 I'm back! Wow, I cannot believe I haven't updated my blog in over two months! For the last couple of months I have been eating the same ol' same ol'. Nothing new and exciting, and definitely nothing that was blog-worthy. I was just completely uninspired to make anything new that I came across.
That was until I went to my sister-in-law's house for dinner about a week ago. Lynn is an incredible cook and every time I go to her house I get to try a new delicious and diet-friendly meal. This time it was Ina Garten's Mexican Chicken Soup. I absolutely love Ina and had spotted this recipe before, but just hadn't gotten around to trying it. What a treat! The soup is light, a little spicy, and very healthy. It's delicious as an appetizer or as a meal and I think it's a good soup to eat year round since it's not heavy at all. I made the soup a little healthier by using skinless chicken breasts and also by choosing fat free toppings. I hope you enjoy this soup as much as I did! Ingredients for Soup:
Preheat the oven to 350 degrees. Remove the skin from the chicken breasts, brush the breasts with olive oil and sprinkle generously with salt and pepper on both sides. Bake the chicken for 35-40 minutes, or until the breasts are cooked through. Set chicken aside and let it cool. Meanwhile, prepare your vegetables. Chop the onions, carrots and celery. Mince the garlic and jalapenos. Finally, crush the tomatoes. To crush the tomatoes, pout the can into a bowl and smash the whole tomatoes with a fork. Then, heat three tablespoons of olive oil on medium heat in a large pot or dutch oven and cook the carrots, celery, and onions in the pot for 10 minutes, or until the vegetables are crisp tender and the onions are starting to brown. Add the garlic to the pot and cook for 30 more seconds. Next, add the tomatoes and their puree to the pot along with the chicken stock, jalapenos, cumin, coriander, 1 teaspoon of pepper, and the cilantro. Bring the soup to a boil and then lower the heat and simmer for 25 minutes. Once the chicken is cool enough to handle, shred it with your hands (or a fork and knife) and add it to the pot. Serve the soup with a little bit of sliced avocado, a dollop of yogurt and some cheddar cheese. Yum! 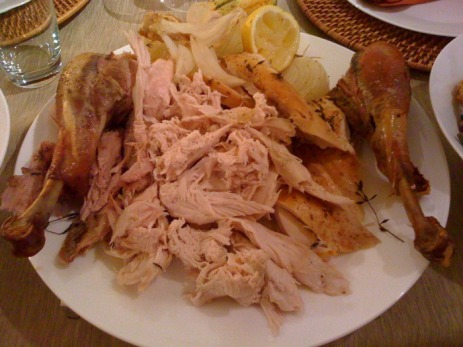 *Once again, this picture does not do the meal justice! I didn't have time to take a picture of the turkey whole and this was right before we were digging in.* My mom makes the best turkey, hands down. Everyone that has tried it always agrees! The turkey is never dry and always falls off the bone because it's so moist and delicious. The best part is, it's incredibly easy to make and doesn't require you to wake up at the crack of dawn to get it done on time. I use this same exact recipe to roast chickens as well, so you can enjoy this recipe year-round if you like! Ingredients:
The night before you want to cook the turkey, take out the neck and giblets, and pour about half the bottle of the mojo marinade on the outside of the turkey and inside the cavity. Cover the turkey with tin foil and put it in a roasting pan in the refrigerator until you are ready to cook it the next day. The next day, begin by preheating the oven to 325 degrees. After that, brush the entire outside of the turkey with olive oil. Put salt and pepper all over the outside of the turkey and also inside the cavity. Then, put a pierced lemon inside the cavity, along with the head of garlic, about 3/4 of the bunch of thyme, and half of the yellow onion. Also, put onion in the neck, and if it fits, some more garlic. Finally, put a few sprigs of thyme under each arm of the turkey and some minced thyme and minced garlic sprinkled all over the outside of the turkey as well. Pour more mojo marinade over the turkey and inside the cavity, cover the turkey loosely with tinfoil and put it in the oven to bake. Use the table on the outside of the turkey bag in order to have an idea of how long the turkey will take to cook based on its weight. I personally do not use a thermometer or any other tool to check if the turkey is done. Instead, I just check it every hour (at which time I baste it with some drippings or more mojo). Once the legs are starting to fall out of the sockets and the juices are pretty much running clear, I uncover the turkey and cook it for about 20-30 more minutes so the outside can brown. Check to make sure the turkey is cooked through (it should be since the legs were already falling out of the sockets before), cut it up, and serve it. That's it! It's extremely easy and so delicious. I have never had a dry turkey or chicken with this recipe and its very flavorful. Enjoy!  Happy Halloween, everyone! Halloween is one of my favorite holidays and I loved that I was able to make something fun and festive for dinner! The original recipe for mummy dogs calls for Pillsbury Crescent rolls, which are extremely fattening and unhealthy. I tried out a new biscuit recipe instead and they came out great! For the boo-tatoes I used 365 organic instant potatoes. They are delicious and make extremely creamy potatoes which were great for the ghosts. I know I should of posted this recipe before Halloween, but unfortunately I was too busy. Make them next year if you can!
Ingredients for Mummy Dogs:
Preheat the oven to 450 degrees. Mix together the flour, baking powder, baking soda, and salt. In a separate bowl, whisk together the buttermilk and oil. Add the milk mixture to the flour mixture. Mix it with a wooden spoon or with your hands. This works better than the standing mixer. Add a little more milk if the dough is too dry to stick together. On a lightly floured surface, knead the dough gently 10 to 12 times. Then, using a floured rolling pin, roll the dough out to about a 1/2 inch thick. Cut the dough into thin strips. Wrap each turkey dog with the strips of the dough. Don't worry if pieces of the dough break off, mummies aren't wrapped perfectly! Make sure to leave a little piece opened at the top for the eyes! Bake the mummy dogs on a non-greased cookie sheet for 12-15 minutes, or until the dough is golden brown. Use ketchup to make two eyes on the mummies and serve with some blood (ketchup). Enjoy! Ingredients for Mashed Boo-Tatoes:
Put the mashed potatoes inside the piping bag and pipe them out into the shape of ghosts. Put two black sesame seeds on each for eyes. Serve with the mummy dogs and enjoy! 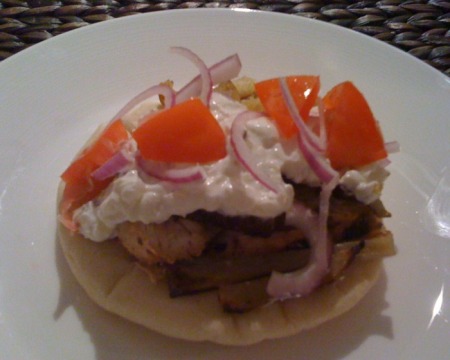 *Warning! This picture does not do the gyro justice. I obviously liked the yogurt sauce a bit too much and smothered my gyro with it. I also overpacked my gyro so much that I couldn't even fold it in half. Woops!* Okay, just a little over two months ago my husband and I were eating authentic chicken gyros in Greece almost everyday for 10 days. Needless to say, I was wary of how good these were going to be in comparison to the mouthwatering Greek gyros. Well, they were absolutely amazing!! They are so close to the original that we were shocked and ate up every bite within a couple of minutes (we didn't even talk!). I actually liked that this recipe is healthier than the authentic ones but you don't miss the fattening ingredients (full fat yogurt, chicken cooked with skin, dark meat, etc.). The original recipe suggests not to use nonfat yogurt, but I promise the consistency and taste was just as good with the brand of yogurt we used. Try this recipe, you will not be disappointed! Thanks to two of my favorite bloggers, Annie Eats and Elly Says Opa for sharing the recipe! (links to their blogs above) Ingredients for Tzatziki Sauce:
To make the tzatziki sauce, strain the yogurt using cheesecloth over a bowl. Let strain for several hours or overnight (I did it for about 24 hours), to remove as much moisture as possible. Shred the cucumber (I used a cheese grater). Wrap in a towel and squeeze to remove as much water as possible. Mix together the strained yogurt, shredded cucumber, garlic, white wine vinegar, salt and pepper to taste, and lemon juice. Drizzle lightly with olive oil. Refrigerate for at least 30 minutes to allow flavors to meld. To prepare the chicken, combine the garlic, lemon juice, red wine vinegar, olive oil, yogurt, oregano, and salt and pepper to taste in a ziploc bag. Swoosh the bag around a bit to make sure that everything is mixed well. Add the chicken pieces to the bag and massage the marinade all over the so that each piece is well coated. Cover and refrigerate for at least 1 hour. Cook the chicken as desired, either in the skillet or in a broiler. I cooked the chicken on the griddle to get some grill marks and then finished cooking it in the oven. Once the chicken is complete, let it rest for a few minutes, and then cut it into strips. Heat the pitas in the toaster or oven, with a little olive oil on top if desired. Serve immediately and get ready for your mouth to water!! Enjoy :) 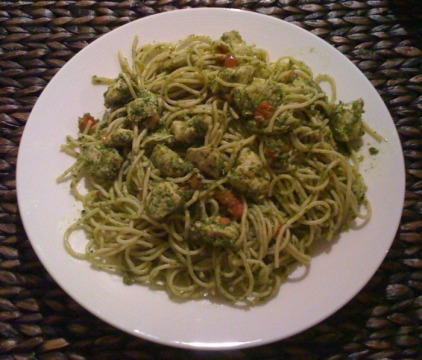 I believe this was the second recipe I ever learned how to cook, about 10 years ago when I was in high school. The recipe has completely changed since then and now it's one of my quick and easy go-to meals that uses only a few ingredients that are standard in our household. This is a an easy recipe to make your own by adding or changing ingredients. I basically eyeball everything while I make it, so make sure to taste it as you go along and adjust the seasoning to your liking!
Oh and I know it kind of looks like some green slop, but it's a very tasty green slop! Ingredients:
Cook the pasta according to package directions. Make sure to salt the pasta and set aside. While the pasta is cooking, cut the chicken into cube or bite-size pieces. Heat a large skillet with 2 to 3 tablespoons of olive oil and cook the chicken on medium-heat, stirring occasionally. While the chicken is cooking, put the onion chunks, whole garlic cloves, lemon zest, and entire bag of spinach into a food processor. Pulse until everything is f minced and a pesto consistency. Then, while the food processor is still on, add 1/4 cup of the olive oil to the pesto. Turn off the food processor, remove the lid and add some salt and pepper and taste. After the chicken has cooked, turn the heat down to a simmer and add the pesto to the skillet. Also add the juice of about half a lemon, or more according to taste. Stir well to combine the chicken with the pesto. Simmer the pesto on low heat for about 5-10 minutes so that the garlic and onion cook a little. Taste the pesto and see if it needs more salt, pepper, or lemon juice. Once the desired flavor has been created, add the pasta to the skillet and stir well to combine. Enjoy! 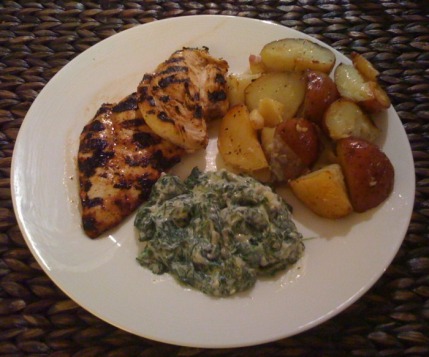 My husband actually came up with this recipe when he lived alone and was searching for something easy to make. He loved Newmans Balsamic Vinaigrette, so he decided to try it as a marinade for chicken. The outcome was amazing! I was even impressed when he made it for the first time. We use Newman's Light Balsamic Vinaigrette because the flavoring in the regular dressing is a bit too strong as a marinade. Try this, it's easy and delicious!
Ingredients:
Put chicken breasts into the re-sealable plastic bag (large ziploc bag) and pour some of the dressing into the bag, until all of the chicken is completely covered (about 3/4 of the bottle). Massage the marinade into the chicken while in the bag, and refrigerate for at least 30 minutes to a couple of hours. Massage the marinade on the chicken occasionally. Heat up the grill and grill the chicken for about 5 minutes on each side, or until cooked through. Serve with your favorite side dishes. Enjoy! 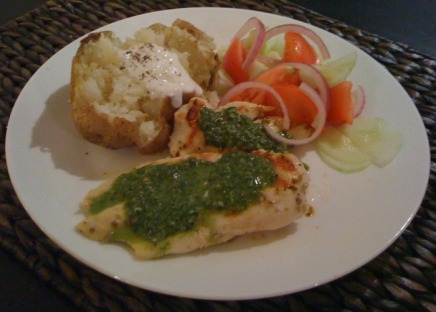 Giada has yet to fail me, and this is one of our absolute favorite Giada recipes. The sauce on this chicken is amazing, and I have made it slightly different ways and its always yummy. Oh and even though this is a strongly flavored chicken, it's always a crowd pleaser!
I actually had the fun time of using my griddle for the very first time for this recipe! Usually we grill on an outdoor grill, but since we are living in a condo, the indoor griddle had to do. That thing is great! We didn't get awesome grill marks, but they were definitely there and the chicken was moist. The best part was, the griddle was so easy to clean! I highly recommend purchasing one of these if you don't have one already. We also use the smooth side for pancakes every Saturday :). Ingredients:
Meanwhile, blend the basil, garlic, lemon zest, remaining 1/4 cup lemon juice, 3/4 teaspoon salt, and 1/2 teaspoon pepper in a blender until smooth. Gradually blend in the remaining 1/3 cup oil. Season the basil sauce, to taste, with more salt and pepper, if desired. Brush the griddle with olive oil and heat it on high. Grill the chicken until just cooked through, about 5 minutes per side. Transfer the chicken to plates. Drizzle the basil sauce over and serve. We served our chicken with a baked potato and some salad. The potato was topped with some plain low fat yogurt, salt, pepper, and garlic powder. The salad was just some chopped up red onions, cucumbers, and tomatoes topped with some low fat balsamic vinegar dressing. Enjoy! 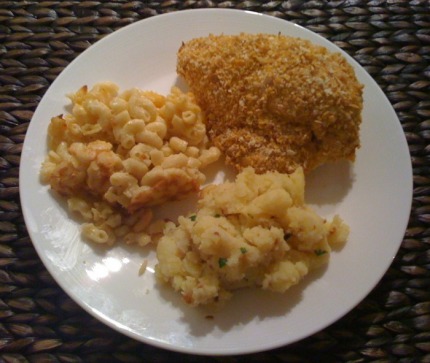 I really love Ellie Krieger from the show on Food Network called "Healthy Appetite with Ellie Krieger". She has lots of amazing low fat and healthy recipes, many of which I can eat without altering them at all! I saw her make Oven Fried Chicken on one of her shows and thought it looked delicious. When I read the reviews online, everyone raves about it, and now I can too!
The recipe was delicious and easy to make. I loved the crusty outside and moist inside. The flavorings are really good and I think this chicken would also be amazing as chicken tenders with a honey mustard dipping sauce. Next time I may try adding a little bit more Dijon mustard because I love that flavor. I made some changes to the original recipe, I used Fat Free Saltines instead of Whole Wheat Saltines and I only used white meat chicken on the bone instead of boneless chicken breast. I served it with mashed potatoes and macaroni and cheese, but something green would definitely have been awesome too. The recipes for the macaroni and cheese and mashed potatoes can be found in the links above! Ingredients:
Preheat oven to 400 degrees F. Lightly spray a baking sheet with olive oil. Combine the crackers and corn cereal crumbs, sesame seeds, cayenne, and garlic powder in a shallow bowl. Reserve. In a large bowl, combine egg whites, yogurt, Dijon mustard, and salt. Add the chicken pieces and coat thoroughly with the yogurt mixture. One at a time, dip the chicken pieces in the cracker mixture, packing crumbs onto chicken. Arrange the chicken on a baking sheet and spray lightly with olive oil cooking spray. Bake for 45 to 50 minutes, or until juices run clear when chicken is pierced with a knife. |  AuthorMy name is Michelle Bolooki and I was diagnosed with Multiple Sclerosis in June 2002. I have been on the Swank MS Diet since April of 2005. I have created this blog in order to share some delicious and healthy low fat recipes that I have come across the last few years. Enjoy! CategoriesAll |
 RSS Feed